Search This Blog

Wednesday, June 26, 2013

[Super Crispy Kale Chips] Unstoppable Healthy Chips

Well, Actually, I'm completely absolutely speechless since I checked the result of Federer's match in the afternoon. This is a very bad nightmare to forget, at least for now. Maybe I should accept the fact that Fed is not almighty... any more? Anyway, a few years ago, I already had decided not to idolize any specific player once Federer calls it a career. It's emotionally exhaustive in many ways.... I'm not going to read any articles about today's match, until the aching of my heart goes away, hopefully in a couple of days. Bref, it's not time to elaborate further in this matter.

I am going to disclose one of my favorite snack recipes, to cheer myself up. I get cheered up when I think, talk, make or write about foods, especially what I like. Now I already feel a little bit better. :) 
Here, I should confess that I have a strange stomach that needs to be fed throughout the day. But, I can't eat much in the evening since I can't go to bed with a full stomach. Or rather, I can go to bed, only with an empty stomach to have good night sleep. Thus, I bring lots of snack to nibble all day, to work. These kale chips are the snack I like very much. You might not believe, but it's not only crispy, but also very very tasty. As you know, a bunch of kale is seriously lots of kale, maybe too much. I had never used up a whole bunch of kale before I came across kale chips a while ago. 

Since then, it became so easy to get through a bunch of kale. Can you believe that sometimes it doesn't look enough for me, to make these crispy chips? I have to warn you that , like any other chips, once you start eating kale chips, it's almost impossible to stop.
You only need three ingredients, including kale, to make these delectable chips. I once forgot to sprinkle salt before I put the baking trays in the oven. But, surprisingly, it was still very tasty without salt! I can finish a whole bucket of crunchy kale chips at a stretch. :(

Here goes the recipe for crispy kale chips.
(adapted from Food Network)

Ingredients
1 head kale, washed and thoroughly dried
1-2 tablespoons olive oil
Kosher salt, for sprinkling

Directions
1. Preheat the oven to 275 degrees Fahrenheit (135 degrees Celsius).

2. Remove the ribs from the kale and cut into bite size. It's easy if you use scissors. As the size shrinks to 1/3 of original size once baked, so don't cut into too small sizes . I cut leaves into about 2" x 2" or even 3" x 3" pieces.

3. Wash and drain thoroughly, preferably with a salad spinner.

3. Lay on a baking sheet and toss with the olive oil and salt. 

Here's my secret tip~ I pour one tablespoon olive oil and then toss & rub one of two batches of kale leaves. 

You will see that 2 tablespoons olive oil is just enough for the whole bunch. I bake a bunch in two batches.

4. Bake until crispy, about 20 minutes.  Don't forget to turn kale leaves half way through. 

Serve as finger food. My kids love these chips too. Do I need to say more? :)
Just make sure you check your teeth for any green after you munch these delicious chips.


Crunch Kale Chips

Monday, June 24, 2013

[2013 Wimbledon] The Men's Singles Draw Analysis and Prediction - The Open Championship

A proper way, for Roger Federer, to celebrate his 10th anniversary of his first triumph at the All England Club in 2003 would be to win The Open Championship in coming fortnight, wouldn't it? Well, that being said, Federer first needs to overcome a dreadful daunting draw, to celebrate his 10th anniversary in a proper way, while the world number 1 Novak Djokovic will enjoy a greatly favorable draw. Here goes my 2013 Wimbledon draw analysis:

The summarized draw looks like this:

1. Novak Djokovic's quarter
(Photo taken at 2009 Cincinnati Masters)
The world #1 should have felt he was pretty lucky to be the other side of all the other three biggest championship contenders, i.e. Andy Murray, Roger Federer, and Rafael Nadal. Djokovic will not see any remarkable challenge, until he would probably meet 13th seeded Tommy Haas, in the 4th round. Haas is an excellent grass court player as he proved it by defeating Federer in last year's Halle final. But, even though Haas has been rejuvenated, I'm not how he will cope with Djokovic's precision and strong will power.
After Haas, Djokovic will probably meet the 7th seed Tomas Berdych in the quarterfinal. Berdych managed to win only twice against Djkokovic, of their 15 meetings, even though Berdych won the latest match in Rome Masters recently. As there's almost certain that these two highest seeds of the quarter will meet each other in the quarterfinal, it would be interesting to see how the potential match turns out.

2. David Ferrer's quarter
(Photo taken at 2009 Cincinnati Masters)
Ferrer is extremely lucky to have such a favorable Grand slam draw two times in a row. Ferrer has never been extraordinary on grass. He had never gone beyond quarterfinal. But, it seems he has a pretty good chance for him to reach the semi-final on the virtue of the world #8 Juan Martin Del Potro. Del Potro hasn't played a match since he lost in the third round of Rome Masters in May. We will find out how Del Potro is recovered from his injuries, when he opens his campaign against Albert Ramos of Spain.

3. Roger Federer's quarter
(Photo taken at 2009 Cincinnati Masters)
When the draw was announced, I saw my fears became a reality: Federer and Nadal will be placed in the same quarter. Federer has the so-called toughest draw of the Big 4, but only from the quarter-final. Well, I learned again that a later stage of the draw might not be that important. I thought Federer had a great draw at Roland Garros, to reach the final. But, he didn't even have a chance to get to the semi-final. Until he reaches quarter-final, Federer will not encounter with any challenge. His nearest seeded player before quarterfinal will be Nicolas Almagro who is not a big force on grass. 

(Photo taken at 2009 Cincinnati Masters)
Rafael Nadal will need to defeat much tougher players, e.g. Paire and Wawrinka, before his eventual meeting with Federer. If Federer can erase Nadal's bid, he will be able to lift the Open championship trophy for the record eighth time.

4. Andy Murray's quarter
(Photo taken at 2009 Cincinnati Masters)
It's unlucky for Murray to draw both Nadal and Federer in his half. But, he is lucky in a way since he only needs to face one of them, if they advance to the semil-final stage. Until then, Murray will have a relatively easy first week. Any of the seeded players in Murray's section of the quarter will be able to bother Murray to reach the quarterfinal where he will face either #6 seed Jo-Wilfried Tsonga or unseeded Ernest Gulbis. #10 seed Marin Cilic is also a force. Cilic pushed Murray to the third set at Queens' final last week.

I'll be surprised if I don't see any of Big 4 in the quarterfinal at this kind of big stage. But, my prediction goes wild from there.

Colleen's prediction
Quarterfinals
Berdych over Djokovic in 5
Del Potro over Kohlschreiber in 4
Federer over Nadal in 5
Murray over Gulbis in 4

Semifinals
Berdych over Del Potro in 5
Federer over Murray in 5

Final
Federer over Berdych in 4

My picks are quite unconventional, aren't they? I know. But, I really hope my predictions come true. :)

Happy Wimbledon Fortnight!

2013 Wimbledon

Thursday, June 20, 2013

[5 Delicious Ways to Eat Apples] Wonder Fruit for Brunch, Snack and Dessert

When somebody asks me what my favorite fruit is, my answer always is 'apple', even though I like all the other fruits so much. If I have to choose only one fruit to eat for the rest of my life, I will choose apple without any hesitation.  Why? It's because apple is the most versatile fruit I know. You can eat apple as it is, or bake, or dip it in dipping sauce. Okay. Let me ask a couple of questions: what is your favorite way to eat apples? And how many apples do you eat a day?
Confession, I eat, at least, three apples a day. One in the morning on my way to work, second one around 10:30 and the third one for my afternoon snack. My usual choice of apples is either gala, golden delicious, honey crisp, or granny smith, especially in summer.

According to this chart, I seem to like sweet, less sweet , tart, and more tart apples, i.e. all types of apples. :) How do you eat your apples? As a great apple lover, I have a few ways to maximize the taste of apple, which I'm about to share :) Here are some awesome ways to eat apples:

1. American staple apple pie or Italian apple cake
Apple cannot be wrong however you bake or cook. I love mounting apples high so that the pie will be still full of filling after it's baked. You can see the recipe here. Even if you have a strong will to have a second piece, I still recommend to refrain yourself from taking another piece, for your own piece of mind :)

Torta di mele is the easiest apple cake I've been making over years and years. Like any Italian food, this Italian cake is just so awesome. You can see the recipe here.

2. Sliced apple with peanut butter
Yes, I know that it's an oh-so typical way to enjoy your apple. This apple-peanut butter combination is so simply delicious, isn't it? Whoever thought of eating this way should be applauded. 

It's also wonderful to have a fistful of nuts along with apple & peanut butter 

 
3. Apple crumble with ice cream
Apple crumble is one of the easiest ways to fix a great dessert. The food rationing in UK during the World War II helped the creation of this scrumptious dessert. You can see the recipe here.

4. Laughing cow with apple slices
I love Laughing cow so much since I was kid that I spread and tried on lots of different things. And of course, apple was one of the first things on top of which was ample amount of this spreadable cheese spread. And it tastes so good!

 5. Apfelpfannkuchen - German apple pancake
At one time, I made this apfelpfannkuchen, or German apple cake almost every weekend since I liked it so much. I still think this is one of the yummiest breakfast you can imagine. It satisfies both your morning sweet cravings and pancake appetite. 

I didn't upload this recipe, yet. I'll post this recipe, soon.

These are my five ways to  enjoy apples. Even if my ways are so obvious, but still fantastic ways to enjoy your apples. :)

5 Delicious Ways to Eat Apples


Monday, June 17, 2013

[Homemade Sourdough Bread] Easy Lazy bread with Heavenly Bready Aroma

 I love the smell of fresh-baked bread, but who wouldn't? That's why I went to the "boulangerie" religiously every morning when I was living or visiting France. The crispy crust of freshly baked pain de campagne which is French sourdough, is the best thing you can have in the morning. I like french bread that is made only with flour, water, and (natural or baker's) yeasts. These simple ingredients make wonderful crispy hard crust with soft texture inside. But, bread making is labour & time intensive, I couldn't make it often. I wish we had at least a boulangerie in a town in Canada. But, I'm pretty sure that my wish will never come true within hundred years.

However, I'm pretty content with my bread self-supply since I've been baking some decent sourdough bread with the sourdough starter I cultured. Sourdough bread's mildly sour taste water my mouth each time. This delicious sour taste is made during a long fermentation of dough using natural yeasts, called sourdough starter. The lactic acid produced by the lactobacilli, or natural yeasts, generates this gently tart taste. And I am glad I can cause that wonderfully sour taste at my own home. It's true that my sourdough starter opens a door for me to try my very own sourdough bread. The active time is not more than 15 minutes in total, but rise time, especially first rise, takes long time. However, you know what? You can just leave the dough and forget about it for a half day. Then, let it rise by itself. After mixing the dough, you have almost nothing to do, but waiting.

Here goes the recipe I've been using so well. This makes a huge dough. I usually keep a half loaf for my family, and share the other half with my neighbours or bring it to the work. 

* You can easily halve the recipe. When you halve the recipe, use a smaller cast-iron skillet to bake a bread with a nicer shape.

** You can swap half of white flour with whole wheat flour, to make a darker/healthier bread.

Homemade sourdough bread

Ingredients
Ingredients
1 c. sourdough starter 
(to make your own sourdough starter, see the link here)
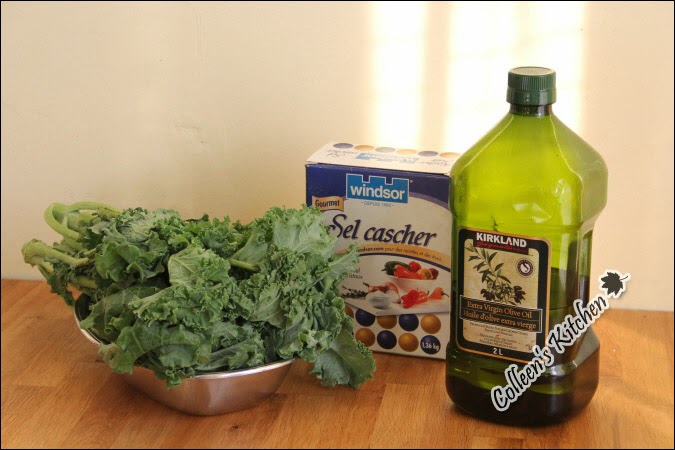
6 c. bread flour (bread flour works best, but all-purpose flour works fine)
3 c. water
2 t. salt
1/4 t. yeast

Directions
  
1. Pour two cups of room temperature tap water (not warm) into a very large bowl. Scoop out 1 cup of sourdough starter and stir it in. The starter likes being stirred up and aerated, so stir or whisk it together vigorously.

2. Take a moment to replenish your starter right now. If you're making one batch of sourdough and using one cup of starter, replenish with 1/2 cup water and 1 cup flour. 

3. Stir in 1/4 teaspoon yeast and 3 cups bread flour. Mix until smooth. If your kitchen is very warm, you don't need that extra beat of yeast. Using only 1/4 teaspoon means that the yeast flavor doesn't dominate the sourdough flavour.

4. Stir in the 3rd cup of water. 

Add the salt and mix thoroughly. The salt will slow down the fermentation. This is a good thing. The longer the sourdough takes to rise, the more sour the bread will be.

5. Stir in the remaining 3 cups bread flour. 
Stir until completely mixed. You do NOT need to knead this bread. The sourdough starter will actually do that for you. All those little yeasts get rowdy and over time inspire gluten fibers to form. This gives the bread its unique sourdough texture.

6. Cover the bowl of dough with a towel and set aside in a draft-free place. Don't be jiggling the dough while it's doing its thing. Leave it alone. And then leave it alone some more. The bread dough needs to just sit and do its thing for 12-15 hours in winter, and 6-8 hours in warmer temperature. 

When it's done, the dough will be bubbly and BIGGER than it was at the start. If the bubbles start to pop, then it's gone too long. It doesn't hurt to peek at it from time to time.

7. It's time for the step that we call "turning out the dough." Start by sprinkling some more flour across the top of the dough. 

Then plunge your hands into the flour bin and get thoroughly floured up. Start by sweeping your hand around and under the dough in the bowl. Scoop the dough up and over. Get a little more flour on your hands. Scoop and roll the dough over. It shouldn't take too many scoops and sweeps before the dough starts feeling elastic and practically alive.

Turn the dough out onto a well-floured surface OR a large piece of plastic wrap that has been sprayed with nonstick spray.

8. Now comes the less-fun but necessary part: washing out the bowl. After washing and thoroughly rinsing the bowl, dry it completely.

9. The dough is ready for its second rise. You oil the inside of the bowl so that the dough will roll out easily when it's time to put it in the oven. 

10. Let the dough rest. The sourdough still has not finished creating gluten fibers, so it needs a few more hours. Cover the bowl with a towel and set in a draft-free area. 

How long the dough rests will depend a lot on the room temperature. If your kitchen is fairly cool, you should let the dough rest another 4-5 hours. If your kitchen is warm, you'll want to keep an eye on things and consider baking the bread after only 2-3 hours. (In may-June, my dough needs only a couple of hours)

11. The type of pan you use is actually very important. The very best option is a heavy cast iron dutch oven with a cover. A covered roasting pan works well, too.

12. Turn your oven on to 450 degrees and stick the pan and cover in to preheat.

13. .Pull the pan out of the oven, being very careful not to burn yourself. Sprinkle corn grits or oatmeal on the bottom of the pan. This will keep the bread from sticking. Gently roll the dough out of the bowl and into the pan. 

14. Pop the cover back on and put it in the oven. Bake at 450 degrees for 30-35 minutes.

15. Then remove the cover and bake for an additional 15 minutes. This will brown up the top of the bread.

After a total of 45-50 minutes, you'll carefully take the bread out of the oven and tip it out onto a cooling rack.

The very best time to eat any bread is about 30 seconds after it comes out of the oven. 

And the very best WAY to eat bread is with butter melting away instantly.

Does it look complicated? But, believe me, it's very simple and easy. You don't even need  any kneading. And as I wrote above, active time is not even 15 minutes. Hope you enjoy baking your bread as much as I do.

Homemade Sourdough Bread