Search This Blog

Wednesday, February 29, 2012

[Roast chicken] $12.06 for three homemade meals

I roasted a fair size chicken last weekend.

Can you believe that I made three meals out of that bird?
I am talking about chicken here, not turkey or goose or duck.

To be honest, I actually wanted to see if I can extract three different meals from a 4-pound chicken.
And surprisingly, I did it!

I felt good and proud of myself~
Okay, confession: I used some other ingredients such as pasta, rice and vegetables.
Still, I used chicken as one of main ingredients. :)

Well, this was possible partially because my household is comprised of 2 adults and 2 kids (of 7 (nearly 8) and 5). This would work for a couple too.
If your household has more than 2 adults, I guess it may not really possible.

Unlike roasting turkey, roasting chicken doesn't require much skills.
On the other hand, chicken is an extremely versatile food that can be cooked in101 different ways.
Turkey is not really difficult either, but as turkey is such a huge bird, it needs some more patience and a little bit of tricks.
If you keep time to baste and allocate enough time for roasting,
chicken will turn out just beautifully.

It's so easy that you don't really need a recipe.
I'll still write the recipe for Basic Roast Chicken here:
    
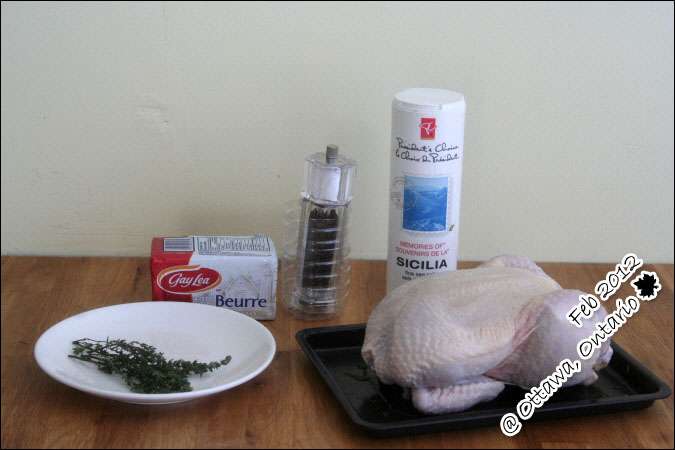
Ingredients (roast chicken)
4-5 lbs chicken
ample salt
ample pepper
butter
 Thyme (optional)

Ingredients (gravy)
Drippings form chicken roasting
2 tablespoons flour
1 cup chicken stock or chicken broth
salt and pepper


How to make:

1. Preheat the oven to a temperature of 375ºF (190ºC). 

2. As I said, roasting a chicken does not take quite so long as roasting a turkey. 
Allocate 20 minutes per pound of chicken.
I roasted my chicken for 1 hour and 20 minutes as it weighed nearly 4 pounds.

3. Rinse chicken under a cold running tap and patted dry with a kitchen towel. It is important to dry chicken completely, to have crispy & brown chicken.

4. Then, season the chicken with ample salt and freshly ground black pepper. 

5. Season the bird inside and out with thyme. 

I stuff some under the skin as it gives a wondeful flavour. 

I happened to hav fresh thyme in my fridge so that I could stuff fresh thyme under the skin of the bird and even into the cavity. But, if you don't have fresh thyme, no worries. Just use dry herb.
If you want a simple basic, but still wonderful roast chicken, you can skip herb part.

6. Place the chicken on a wire rack set in a roasting tin and grease the skin of the chicken with either butter or olive oil. 
Actually it's better to grease the chicken before seasoning. But, this time, I happended to do the other way round. :)
I bought a alredy trussed chicken. When I buy a chicken that is not trussed, I always truss it. It's up to your decision.

7. Place the chicken in the preheated oven, and remove it every 20 minutes to baste with butter, or juice dripped.
It will become pale after the first 20 minutes.

but it will show its golden skin by the second baste, i.e. 40 minutes after.

And it will have more color as it is roasted.

Insert the meat thermometer into the thickest part of the chicken's thigh, without touching the bone. When the meat thermometer reaches a temperature of 170ºF, the chicken is done,
Oh, if you don't have a thermometer, insert a skewer into the leg of the chicken. If juices of the chicken run clear, the chicken is done.

When properly cooked, remove the chicken from the oven and leave it to rest for 10-15 minutes before you carve and serve.

While chicken is resting, scrape the roasting pan and  put 2 tablespoons of flour in the roasting pan over the stove top. 

Once roux(flour + fat paste) is made, pour 1 cup chicken stock or chicken broth and simmer until it reaches the consistency you want. Stir vigoursously from start to end. 

You can also make some side dishes. As all four of my family, including myself, loves steamed vegetables, I steamed some hard vegetables to serve with. It's also the easiest side dish you can make :)

Once the chicken has rested, it will then be ready to carve and serve.

We ate this for lunch,

Then, I made some flavourful stock with chicken bones, to make chicken noodle soup. I put more vegetables and put tortellini from the freezer.

This made our Sunday dinner~

Kids liked it very much.

I still managed to save some chicken pieces and vegetables for Monday.
And guess what I made for Monday dinner, I made chicken curry fried rice.
It was easy and yummy :)

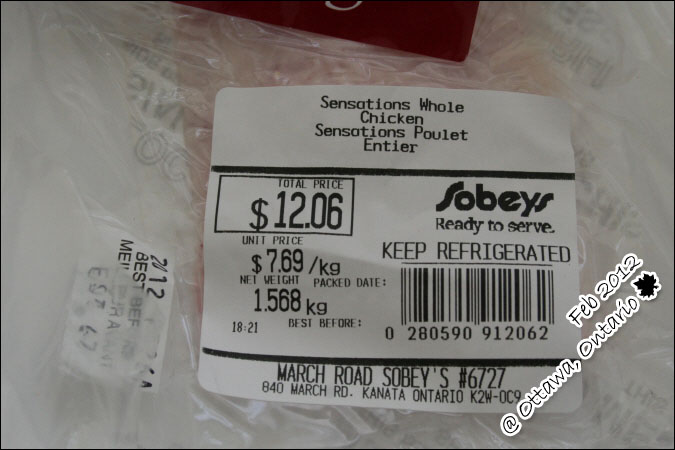
But, I got to know, only yesterday whether you believe it or not, that a whole roast chicken that is ready to eat is $7.96. I know I have been sooooooo ignorant.
First I got perplexed. and now I'm discouraged to roast a chicken.

Can you give me some good reason why I should roast chicken at home, using hydro(electricity), water, and my time to roast a raw chicken that cost me $12.06, while I can simply buy a ready-to-eat roast chicken at $7.96?

Roast chicken with gravy

Sunday, February 26, 2012

[Homemade Waffle] A small but nice weekend treat

I usually ask my kids, in Friday evening, what they want to have for Saturday breakfast.
They eat breakfast at daycare on weekdays. Even though the eat a very good breakfast,
I want to make them something they want to eat in the weekend.
Maybe because breakfast is the most important meal of the day for me.
I don't mind sleeping not so much for a few days. I can live on 5-hour sleep for a week.
No problem.
But, I have a huge problem if I don't eat a filling and satisfying breakfast in every morning.
Simply I don't function properly without a good breakfast.
That is why I wake up earlier and spare a good chunk of time to have breakfast.
Well, the fact that I am a very morning person makes it easy for me to wake up to eat. :)
I was really surprised when I learned there were people who rather preferring sleeping 15 more minutes to having breakfast. Mr. D was such a person when we first met.
But, guess what, he doesn't skip breakfast not any more, since we got married.
First, I had to force him to wake up, which I still do every morning :(, but now he eats breakfast voluntarily.
And we eat a nice long breakfast in the weekend, whether at home or at a diner.


I want to make them a good weekend breakfast, and I secretly(?) hope my kids, even after they grow up,  will come to our place, with their significant others and kids, to have weekend breakfast.  :) But, as you know, that is something beyond my control.

That being said, Remi is a little creature who wants to eat something different every day.
(On the other hand, Pablo is a creature of habit, and usually wants to eat the same thing.)
And a few weeks ago, he ordered(?) waffles for the weekly Saturday breakfast. His brother ordered the same thing. Thank Goodness. It doesn't happen often. :)
I took my tiny waffle iron/maker out from the storage the night before.

I know, I know.
I also have dreamed about a round circular waffle maker what you usually see at a breakfast restaurant.
But, as this little friend is performing just fine, I cannot justify myself to buy another waffle maker.

Guess how much I paid for this little waffle iron.

I paid $13 + tax for this machine. I bought it either at Walmart or at Canadian Tire.
It doesn't have a temperature dial/control.
But I don't really need it. Switch on/off is all I have :(
Well, actually it's not as hot as more powerful machines, but still it works fine.
So I think I'll use it, at least, for a while.

Here goes the recipe.
The recipe was adapted from All Recipes.

Ingredients
(3-4 servings)

1 egg
1 cup all-purpose flour
3/4 cup + 2 tablespoons milk
1/4 cup vegetable oil
1+1/2 teaspoons white sugar
2 teaspoons baking powder
1/8 teaspoon salt
1/4 teaspoon vanilla extract


Topping (optional)
fruits
whipped cream
butter
maple syrup
icing sugar


How to make:

1. Preheat waffle iron. 
Don't skip this part.
It's very important to preheat the machine, to have waffles that are crispy on top, and soft inside.

Preheat oven to 150-170 Fahrenheit. You can keep waffles warm while you make several batches.

2. Beat egg in large bowl with hand beater or mixer, until fluffy.

3. Beat in, milk, vegetable oil, salt and vanilla, just until smooth.


4. In another bowl, mix dry ingredients, i.e. flour, baking powder, and sugar.

5. Beat in dry ingredients.

Don't over mix the batter, unless you want chewy waffles~

6. Spray preheated waffle iron with non-stick cooking spray if your waffle machine tends to be sticking.
Mine is non-stick. I guess most modern(?) waffle irons are non-stick.
Pour mix onto hot waffle iron. 

7. Cook until golden brown, for 3-4 minutes.

Place waffles made on a baking sheet and keep them warm in the preheated oven.

Serve hot, with topping(s) of your choice :)

I serve with icing sugar, butter, maple syrup, and whichever fruit we have. :)
It's sweet, but as I said, weekend breakfast is a small treat for all of us, isn't it? :)

Enjoy~

Homemade Waffles

Friday, February 24, 2012

[Whole wheat pizza dough] Super-duper easy pizza dough

Pizza can be a highly versatile food.
It also can be a (sort of) healthy food.
On top of that, pizza is very easy to make from the scratch.

Well, I realized that frozen pizza can be cheaper than home made one.
But you know what, 
it might be cheaper to buy a ready made pizza, but it simply cannot be healthier than what you make at your own kitchen.

I got this recipe from the Shape (fitness/workout magazine) last year.
I know, I make about 101 excuses not to work out. But, still I do buy those magazines. 
It sounds silly, and Mr. D thinks it's a total waste, but I find a nice recipe to use almost each volume I buy.
So, it is not as bad as you might think :)

I like bready pizza dough too.
But, my favorite would be a super-thin crust pizza.

I use either stand mixer or bread machine to make pizza dough.
But, you can also exercise your handcraft talent. :)

The best thing about pizza dough is, unlike bread dough, it does't need a second rise.

In the weekend,
I give a small piece of piazza dough to kids and let them make their own pizza with toppings of their choice.
Well, anyway they only like pepperoni pizza. So not much things to prepare.

One of my favorite pizza is olive pizza.
Confession:
It doesn't matter how much I eat olives,
I can't eat enough olive.

So last weekend,
kids and I made pizza together.
(Boys made their own pizza each, and I made for Mr. D and me)
Mr. D didn't participate in this activity.
He prefers cleaning up the mess to making/cooking.
And I don't complain about it :), because I'm an awesome wife. :)

Here goes the very easy whole wheat pizza dough recipe:
   
Ingredients

1 cup bread flour
1 cup whole wheat flour
2 teaspoons active dry yeast
1/2 teaspoon salt
1 teaspoon sugar
2/3 cup cold water


How to make:

1. If you use bread machine, making pizza dough becomes a piece of cake. Mix all the dry ingredients and make a well in the centre and pour the cold water. 

Then, press the menu button to set "dough"   mode. 

Then, you can wait until the dough is risen and gets ready.

If you are mixing it by hand , stir all the dry ingredients in a large bowl and make a well in the centre and pour the cold water.
Mix well until it comes to get together. Put dough out onto a floured surface, and knead until all of the the dough becomes elastic and smooth, about 8-10 minutes.
Put 1 teaspoon of olive oil in the bowl, and place dough in the bowl and flip to the other side so that the dough is oiled all around. Cover loosely with a towel, and let stand in a warm place until doubled in size, about 1 hour.

2. When the dough is doubled, tip the dough out onto a lightly floured surface, 

and punch down the dough, and form a tight ball. 
Then pizza dough is ready to be used. Doesn't it look healthier? :)

This is the size of dough I gave to each of my kids

(If you are going to bake your pizza on a pizza stone, you have to place pizza stone in a cold oven and then turn the oven on. If you place your cold pizza stone  into a hot oven it will very probably shatter. )

Preheat the oven to 450 degrees F (230 degrees C). 


Roll a ball of dough with a rolling pin until it will not stretch any further. 


Top pizza with your favorite toppings, such as sauce, cheese, meats, olives or vegetables. :)
As my pizza stone is not too big, I have to bake in two batches if kids make their own pizza.

Last weekend, I topped pizza sauce (ketchup + ample oregano), mozzarella cheese, onion, pepperoni and sliced olives.

Bake for about 15 minutes (depending on how thick it is) in the preheated oven.

Leave the pizza on the stone for about 5 minutes before you serve.

Pepperoni is hiding under cheese in Pablo's pizza.

Enjoy! :)


Whole Wheat Pizza Dough